

Good Luck!
Technorati Tags: xp start button,rename xp start button text
Readmore,..
Good Luck!

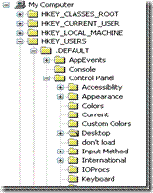
Before doing some of these tricks you better backup your Registry first. How to backup Registry? emm,it's pretty easy actually,simply go to Regedit (click start-Run-type 'regedit' - click OK), click File-Export and save it anywhere (but don't forget where you save it) and you can name it anything you want


I will tell you some useful tricks about Registry Windows which is simple to do, but you have to pay attention carefully because if you miss the procedure or even doing something wrong, it can be harmful..... but you can use your Backup to fix your Registry, Okay so here we go:

So, after you done with those tricks you need to restart your computer to see the result. Good luck !!
Readmore,..Fed up with your time-consuming PC-startup times? Well, previously in my blog i have review about startup blaster, a software which can optimize your startup time, But, I got another simple tips that can optimize your PC startup time, this time i tell you how to do it using msconfig :
First, click Start Button,and click Run,(you can use Windows key+R for instant)
Next, on the textbox appeared, type msconfig.
Then, you'll see a medium-sized dialogue box, this called msconfig box, the 'room' which your startup setting is controlled.
you should select Startup Tab on the top-right pane;to faster your startup time,you should click the 'Disable All' Button 
And you'll see that the Startup item on the list are all unchecked, it means that no program will be executed in your next PC startup,but some system file must be executed when startup,usually antivirus system.
Click OK
Restart your computer to see the result.
Sure, we don't actually have any real idea what Windows 7 will look like. But if you believe the screenshots floating around the web, the next version of Windows will look an awful lot like Vista. With a few new effects. And so when the folks at DeviantART decided to put together a few Windows 7 themes for Windows XP, it shouldn't come as a surprise that the themes look and feel a lot like Windows Vista.
That said, they're much prettier than the default themes available for Windows XP. Unfortunately, Microsoft doesn't make it easy to install third party themes for Windows XP. Officially you're pretty much stuck with Windows XP, Windows Classic, and a Microsoft Zune theme. So the first thing you need to do to install a third party theme is to install a program called UxTheme Patcher.
If you're running Windows XP SP2 or earlier, you can download a Windows 7 theme and UxTheme Patcher in one fell swoop at MegaLeecher. Just unzip the file and click the multi-patcher file in the UX Theme Patcher Folder and then click the Windows 7 M1 VS.msstyles file in the Windows 7 M1 VS subfolder in the Themes folder.
But the included UxTheme Patcher isn't compatible with Windows XP SP3. So if you have SP3 installed, you'll need to download and install a patcher from another location. Once you've done that and rebooted your system, you should be able to install third party themes like the Windows 7 theme. Just don't expect it to look like much other than a Windows Vista theme.
What are some of your favorite third party themes for Windows XP? Let us know in the comments.
[via Life Rocks 2.0 and Shell Extension City]
Today tips is rather oldschool, but i bet that some of you havent know how to disabled Run and Shutdown Menu, simply using Notepad in Windows. First thing I tell you that this tips or tricks is easy to do, and don't do it to disturbed someone computer, I write this in purpose to give you all information about computer.
Today tips is telling you how to hide and lock your private folder, in this case your private folder named ‘private’ . I tell you that this trick is very easy to do, just copy the code below and paste it in notepad:
@ECHO OFF
lock your folder
cls
if EXIST "Control Panel.{21EC2020-3AEA-1069-A2DD-08002B30309D}" goto UNLOCK
if NOT EXIST Private goto MDPRIVATE
:CONFIRM
echo Are U sure want to lock the folder ??(Y/N)
set/p "cho=>"
if %cho%==Y goto LOCK
if %cho%==y goto LOCK
if %cho%==n goto END
if %cho%==N goto END
echo Invalid choice.
goto CONFIRM
:LOCK
ren Private "Control Panel.{21EC2020-3AEA-1069-A2DD-08002B30309D}"
attrib +h +s "Control panel.{21EC2020-3AEA-1069-A2DD-08002B30309D}"
echo The Folder has been locked
goto End
:UNLOCK
echo waitz.... enter the pass first!!!
set/p "pass=>"
if NOT %pass%== private goto FAIL
attrib -h -s "Control Panel.{21EC2020-3AEA-1069-A2DD-08002B30309D}"
ren "Control Panel.{21EC2020-3AEA-1069-A2DD-08002B30309D}" Private
echo Folder Unlocked successfully
goto End
:FAIL
echo Invalid password
goto end
:MDPRIVATE
md Private
echo The Folder successfully made
goto End
:End
After you paste the code above in notepad worksheet, save it with file name:LOCK.bat
I tell you not to forget to give the extension .bat.
And then run the batch file named LOCK which you have made earlier, and you’ll see there’s a new folder named private.
Save all your private data, document, music, video, etc in that folder. Then to lock the folder, you have to run the batch file again. If you sure want to lock that folder type Y on the command prompt line.
And then you’ll see that the folder had been disappeared. If some time you want to access that folder again, just double click the batch file named LOCK and enter the password, which is originally private.
You can change your password by making a little change on the command line situated in row 21:
if NOT %pass%== private goto FAIL
Change the word private with your new password characters.
And finally save the change.
Translated and adapted from Jatibarang blogspot.
Click here to download Google Chrome
Google takes aim squarely at Microsoft with the release of its new Web browser, Chrome. Even though it isn't jam-packed with features, Chrome lives up to its hype by rethinking the Web browser in clever and convenient ways that make using the Web a more organic experience than you'd get with either Microsoft's Internet Explorer 8 or Mozilla's Firefox 3.
Initially available for download for Windows Vista and XP, Google plans to expand its Chrome offerings to the Mac and Linux platforms as well. The company doesn't offer any timeline for these versions, though. (For additional PCWorld.com coverage of Google's new browser, see "Chrome vs. the World" and "Google's Chrome: 7 Reasons for It and 7 Reasons Against It.")
Good features of Google Chrome:
After you feel excited about Chrome, here are the tips to supercharge your Chrome experience I got from pctipsbox.com:
1) Install flash player in Google Chrome
After you have installed Chrome, some of you will find that you are not able to view Youtube video. This is especially true if you are installing Chrome under Ubuntu (or other Linux distro).
Here is what you can do to fix the problem:
Restart your Chrome. Your flash player should be working now.
2) Search from the URL bar
Unlike Firefox, you can’t find a search bar in Chrome. To perform a search, simply type your search phrase in the URL bar and press ‘Enter’. Chrome will automatically perform a Google search with the phrase.
If you want to go to a site rather than performing a search, press “Ctrl + Enter” instead. This will insert www and .com in front and behind of the term and Chrome will bring you to the site.
3) Change omnibox suggestion count
By default, Chrome only shows 5 URL suggestions when you type in the URL bar.
o increase/decrease the suggestion count, simply add the command line switch
–omnibox-popup-count=your_desirable_suggestions_count
where your_desirable_suggestion_count is the number of suggestions that you want it to show.
In Windows, right click on the Chrome shortcut icon and select Properties. In the Target field, add the above command line switch to the end of the command.
In Ubuntu, on the desktop, right click on the Application menu and select Edit Menus. Navigate to wine->Programs->Google Chrome on the left pane. Double click on Google Chrome on the right pane and edit the Command
4) Creating multiple profiles
If you are sharing your computer with others (such as your family members), you may want to create a separate profile for everyone others won’t have access to your search history.
Open the User Data folder your Chrome installation directory.
For Windows Vista
C:\Users\\AppData\Local\Google\Chrome\User Data
For Windows XP
C:\Documents and Settings\\Local Settings\Application Data\Google\Chrome\User Data
For Ubuntu
/home/USERNAME/.wine/drive_c/windows/profiles/USERNAME/Local Settings/Application Data/Google/Chrome/User Data
Copy the Default folder and paste it in the User Data folder under another name (say Your_name).
Create a shortcut icon on your desktop and add the following command switch to your path:
–user-data-dir=”..\User Data\Your_Name”
For Vista:
C:\Users\USERNAME\AppData\Local\Google\Chrome\Application\chrome.exe -–user-data-dir=”..\User Data\Your_Name”
For Windows XP
C:\Documents and Settings\USERNAME\Local Settings\Application Data\Google\Chrome\Application\chrome.exe –-user-data-dir=”..\User Data\Your_Name”
For Ubuntu
wine /home/USERNAME/.wine/drive_c/windows/profiles/USERNAME/Local\ Settings/Application\ Data/Google/Chrome/chrome.exe –new-http –in-process-plugins –-user-data-dir=”../User\ Data\Your_Name”
5) Change Chrome theme
If you don’t like the default theme, you can easily change it with the following steps:
In Chrome, you can easily create a bookmarklet to email links with your Gmail account. Here is what you do:
In your Chrome, press “Ctrl + B” to load the bookmark bar. Right-click on the bar and select ‘Add Page‘
In the Name field, type Send with Gmail (or whatever name you like).
In the URL field, copy and paste the following code:
javascript:document.location=’https://mail.google.com/mail/?ui=1&view=cm&fs=1&su=’+document.title+’&body=’+document.location;
and press OK.
If you want Gmail to load in a separate tab, insert this code instead:
javascript:window.open(’https://mail.google.com/mail/?ui=1&view=cm&fs=1&tf=1&su=’+document.title+’&body=’+document.location);return false;
Whenever you want to send a link to other, simply click the Send with Gmail bookmarklet and the Gmail compose mail window will appear.
This trick allows you to download Youtube video right from your Chrome.
Same as the Send with Gmail trick, make a new bookmarklet and name it Download Youtube
In the URL field, copy and paste the following code in:
javascript:window.location.href=’http://youtube.com/get_video?video_id=’ + swfArgs['video_id'] + “&l=” + swfArgs['l'] + “&sk=” + swfArgs['sk'] + ‘&fmt_map’ + swfArgs['fmt_map'] + ‘&t=’ + swfArgs['t'];
Now go to Youtube and watch any video. Click the Download Youtube bookmarklet and it will save the current video to your hard drive. Remember to add a .flv extension to the downloaded video.
8 ) Zoom in/out
For those who find that the font is too big/small for your viewing, you can zoom in/out the page by pressing Ctrl + Mousewheel.
9) Drag and drop tab to load in a new window
When you have more than one tabs, you can easily drag any tab and drop it on the menu bar to load a new window.
10) Install Greasemonkey on Chrome
Although Greasemonkey is an addon for Firefox, you can easily get it to work in Chrome with this simple tweak:
Drag this Monkey to your Chrome bookmark bar.
This Monkey bokmarklet will enable any userscripts to be automatically turned into bookmarklets.
To install Greasemonkey script on Google Chrome, go to user script and search for the Greasemonkey script you want. Visit the installation script page which says “install the script” and click on the Monkey bookmarklet, this will change the script into Chrome compatible bookmarklet. Now drag “Install the script” onto the bookmark bar of chrome.
Click here to download Google Chrome
Just as usual,i will give you free software,and some review about it. In this moment,I give you Startup Blaster for free.Startup Blaster is a software made by XenCare,like it called,its function is to faster your windows startup. So,this software is right for those who fed up with slow startup on your windows operating system.
Actually,there are some reason behind slow startup on your computer,one most considerable is your startup system that contain:
Those things automaticaly added in your startup system when you install various programs on your computer. Therefore, you can filter what startup entries that windows should load it or not when windows startup. Just click Windows,point to Run,and type msconfig,click on the startup section,there you can check and uncheck startup entries windows should load it or not.

But,if this trick doesn't work effectively on your computer,you should spend some time to try Startup Blaster. I tell you, it has a simple interface, so it doesn't difficult you when you are using it.
There, you can wheter delete or delay Startup programs, which give you a flexibility of doing your computer things. Click this link below to download Startup Blaster.
Readmore,..1. Family Cyber Alert
Download Now (2.48MB)
Are you concerned about your children's online activities? Do you feel you should keep a closer eye on what they are doing in cyberspace? Concerned parents are using Family Cyber Alert, an all-in-one PC/Internet activity monitor, to keep a watchful eye on their family and monitor their PC/Internet activities. This parental control tool records everything your family members do online and offline, including e-mail, chat/instant messaging, Web sites, applications, file access, keystroke (keylogger), screen snapshots, and time and sequence.
2. Soft Activity Keylogger 3.8
Download Now (10.81MB)
Secretly record keystrokes, e-mail, chat and programs on your child's computer. Monitor how your computer has been used while you are away. Keep an eye on how your children use their computer online
3. Secunia Personal Software Inspector 0.9.0.1
Download Now (474.66K)
The Secunia PSI allows you to scan, detect, check, and secure the applications installed on your computer. Get an assessment of the applications installed on your computer are they insecure, end-of-life, or patched. The Secunia PSI enables you to secure your applications, and to quickly and easily upgrade to new and secure versions of applications installed on your computer. Providing a graphical presentation of your performance week by week. Version 0.9.0.1 includes unspecified updates.
4. IMMonitor AIM Spy 2.2.8
Download Now (1.24MB)
IMMonitor AIM Spy allow you to monitor, block or record AIM (AOL Instant Messenger) chat conversations remotely, Is your spouse, child, or friend hiding secrets from you, or you suspect they're engaged in dangerous conversations, If so IMMonitor AIM Spy is your best choice for anyone that needs this information quickly and secretly. It's easy to use and no additional program installation is needed on the monitoring target computers. Version 2.2.8 may include unspecified updates, enhancements, or bug fixes
5. Optenet Web Filter PC 9.6
Download Now (29.94MB)
Manage your family's Internet environment. Block pornography, drugs, violence and other Internet content children should not access. Manage the time each child spends online. Control what your kids download onto the family PC. Keep your family safe and secure. Rated more accurate than any other solution available.
Version 9.6 is compatible with Windows Vista and adds improvements in the traffic capturing mechanism.
6. Total Spy 2.7
Download Now (590.48K)
Total Spy is an all-in-one spy program that intercepts everything that is typed on keyboard, controls started applications, and active windows, visited URLs, scans Windows clipboard for changes, makes invisible screenshots from time to time, and writes this all to hidden folder on a hard drive. This program is absolutely invisible for everyone except you. You will only have to press the specified hot key to view the program. Version 2.7 is compatible with Windows Vista.
7. SurveilStar
Download now
SurveilStar is the powerful and easy-to-use PC monitoring, employee monitoring software that improves productivity. It records every detail of computer and Internet activities - emails, chats and instant messages, web sites visited, search history, program activities, document operations, printing, disc burning, movable devices, and many more. With SurveilStar, you can monitor everything they do on computers and the Internet, nothing hides from you.
The surveillance screen snapshot feature enables you to see exactly what the monitored targets do on their computers, like you are watching behind them.
It happens at least once in the life of every notebook computer-it slows down in performance, and just doesn?t have the get up and go that it used to. Like most people, you run your favorite antivirus program(s) to make sure that ?bugs? haven?t infected your system, and you even run spyware programs to make sure that spyware isn?t overloading your system resources. To take things a step further you clear out unnecessary items from your start menu, make bios adjustments and get rid of old programs you haven?t used in a while.
After all that, your laptop computer still runs slow and you realize - it?s time for an upgrade.
Once upon a time, laptop and notebook upgrades were considered ?technician only? activities because of the fact most notebook manufacturers have proprietary technologies in their systems. That is still true to some extent, but the main hardware components affecting system performance in most laptops are those that have become pretty much industry standard. These are:
1.) Hard Drive 2.) Memory 3.)Processor
These components can be easily replaced in most notebooks. The first thing to do however is to determine if the upgrade is worth the cost. Check prices online to see how much it will cost. If I pay $120 for a hard drive, $50 for memory and $150 for a new processor, it may not make sense to do all three upgrades, I may only want to choose 1 at first and then check system performance.
If my laptop wasn?t very expensive to begin with, I may want to consider just purchasing another one. If I can get a Refurbished Windows Vista HP laptop for $499.00, that may make more sense than upgrading components on an older system.
CNET.com offers an online course on how to upgrade a used notebook computer step by step. Check it out and determine which option is right for you.
Readmore,..Today tip is very useful for those users who are still using computer with minimum processor speed. To increase the performance of slow computer, you can force your system to free up the idle tasks that are running in the background and sharing processor power. This end tasks method force the computer to devote its full processor resource to what you want it to do.
Follow the given steps to end the idle tasks:
Have you ever lost your important data or file saved on your computer? I know that pain. So, in this article I give you the best 10 undelete tool which you can download FREE!
Readmore,..Source:detikinet.com and recovery-reviews.com
Open your Firefox browser and type about:config then press enter
2. Click the button I’ll be careful,….
3.In the filter bar type network.http.pipelining, the value field should be set true, you can do it by double-click it.

4.Next, in the filter bar type network.http.pipelining.maxrequest . Double click this field and set its value to 8.
5. In the filter bar type network.http.proxy.pipelining . Double click this field to set the value field become true.
6. Right click on about:config window (for apple user ctrl+click) select new and then click Boolean

7. Type content.interrupt.parsing in the New Boolean pop-up window and then click OK.
8. Then, select true and click OK
P.S: I got this tips from www.pctipsbox.com, I just tried it and it works like a charm
Readmore,..IP Address (Internet Protocol Address) is a row of binary numbers between 32 bit, until 128 bit. IP address is used as an identification address for each host computer in a network system.
How to see my IP Address?
It’s easy to see your IP Address of your computer. First, you need to click Windows and then go to run, type cmd. On cmd, type ipconfig and you will see your IP Address. Don’t forget to add ‘/all’ switch for more information about your IP Address.
"How do I change my IP address?"
Before trying any other methods to change your IP address, try turning off (or unplugging the power of) your Cable/DSL modem for five minutes. In many cases this will change your IP address. However, if that does not change your IP address, repeat the process for 8 hours (overnight works well) instead of 5 minutes. Hopefully this will result in an IP change.
If the above does not result in your IP address changing, please look through the below for the situation that best matches yours and attempt to change your IP address that way. Unfortunately you are not able to get your IP address to change in all cases, as it is ultimate determined by your ISP's DHCP configuration (when you've got a dynamically assigned IP address, that is.)
Windows - Computer connected directly to the modem


Windows (second option) - Computer connected directly to the modem
Network with Router
If you are using a cable/DSL modem and a router, you may wish to connect your computer directly to the cable/DSL modem. Please note that this could significantly impact your system security. This allows your ISP's DHCP to issue you a new (hopefully changed) IP address based of the (hardware) MAC address of your computer's ethernet card.
If all the above has not worked to change your IP address and you have a router, check and see if there is a "Clone MAC Address" option. Using it should change your IP address; however, you'll only be able to do it once (in most cases).
These will not work in all cases. If all else fails contact your internet service provider (ISP) and ask them if they are able to change your IP address or how long your connection needs to be off for your IP address to change.
Readmore,..Source : http://whatismyipaddress.com and other sites related to the topic
Ever thought to be a hacker? Well this article will show you a little tips to change someone account’s password with a simple line of command. All you need to do are:
Sometimes you want to access certain folders on your computer regularly, but if you have to always open those folder every time you turn on your computer, obviously it takes so much times. So, you can set them re-open automatically every time you turn on your computer. Here is the tip:
3. If you can’t find the Folder Option on the Tools menu, just read the article about Recover Folder Option.
4. If you have clicked it, select View Tabs.
5. Look at the Advanced Setting area, scroll down to bottom and then give checkpoint on the Restore previous folder windows at logon, and then click OK.
6. Now and forever when you log on or restart, your computer will open the previously opened folder for you, as the same location before.
7. Now, when you turn on, restart or log on to your computer, your windows will automatically open the previously opened folder on your computer.
Readmore,..In this article I will show you how to uninstall Windows Messenger on your XP. Yes, for some people who already have MSN messenger on their XP apparently they don’t need 2 free messenger programs from Windows, because so far MSN messenger is better than Windows Messenger so I’ll show you how to uninstall Windows messenger that will save your drive space.
msmsgs=msgrocm.dll,OcEntry,msmsgs.inf,hide,7
4. The next thing you have to do is delete the words ‘hide’. And it should now look like this:
msmsgs=msgrocm.dll,OcEntry,msmsgs.inf,,7
5.After you have done it, save the file and close it.
6. For uninstalling your Windows Messenger, go to Contol Panel – Add or Remove Windows Components. On the list you should see “Windows Messenger” Check the box beside it and click next and follow the next instruction.
7.Finally, you have done with your job. The last thing you need to do is just restart your computer to see the result.
Readmore,..For people who have computers, surely they don’t want to have only a hard drive in their computers. Instead, they need some hard drive (commonly 2 or 3) in their computer, so they can group their private data, system files, or their other stuff. So, an ability to partition hard drive is needed in order to group your stuff in your computer.
Disk partitioning is the creation of separate divisions of a hard disk drive using partition editors. Once a disk is divided into several partitions, directories and files of different categories may be stored in different partitions. More partitions provide more control but too many become cumbersome. The way space management, access permissions and directory searching are implemented depends upon the type of file system installed on a partition. Careful consideration of the size of the partition is necessary as the ability to change the size depends on the file system installed on the partition.
Partitioning your Hard Drive in Windows XP & Windows 2000:
When you right-click a file name or a thumbnail in Microsoft Windows XP, you see a shortcut menu for that file. One of the items on the menu is Send To, which enables you to quickly e-mail a file, copy it to your desktop, or copy it to a floppy disk.
Sometimes what you really want to do is to save a copy of the file to a specific folder on your computer. If you have a folder where you frequently place files, you can add that folder’s name to the list of locations on the Send To menu. This can save you the time of opening another Windows Explorer window and copying the file from one folder to another.
For example, you could create a My Pictures folder and then use the Send To menu to copy your best pictures to that folder.
To add a folder to the Send To menu
4. In the My Computer window, double-click Local Disk (C:), double-click Documents and Settings, double-click your user name, and then double-click SendTo.
5. Click the File menu, click New, and then click Shortcut
6. The Create Shortcut Wizard appears. Click the Browse button.
7. In the Browse For Folder dialog box, click the folder you want to add to your Send To menu, and then click OK.
8. Click Next, click Finish
9. Now when you right-click a file and click Send To, the destination you selected will be an option on the Send To menu. You can create shortcuts to local or network programs, files, folders, computers, or Internet addresses.
Just like the title above, I will give you easy tips to make folder shortcut.
Do you have a folder that you want to access it fast whenever you want? The only solution for it, is make a shortcut for that folder which known as folder shortcut. Here we go:
1. Go to My Computer or Windows Explorer and find the folder you want to access quickly later.
2. If you have found the folder you want to instant access, then right click on the folder, point to Send to and select Desktop
3. Now, go to desktop and right click on the sent folder, and select Properties
4. Click Shortcut Tab and look for “Shortcut Key” row, on the empty box next to it you can type the shortcut to instant access your folder.
5. Click OK, and you only have to test your job.
Readmore,..


