Lock Your Private Folder

Today tips is telling you how to hide and lock your private folder, in this case your private folder named ‘private’ . I tell you that this trick is very easy to do, just copy the code below and paste it in notepad:


@ECHO OFF

lock your folder

cls

if EXIST "Control Panel.{21EC2020-3AEA-1069-A2DD-08002B30309D}" goto UNLOCK

if NOT EXIST Private goto MDPRIVATE

:CONFIRM

echo Are U sure want to lock the folder ??(Y/N)

set/p "cho=>"

if %cho%==Y goto LOCK

if %cho%==y goto LOCK

if %cho%==n goto END

if %cho%==N goto END

echo Invalid choice.

goto CONFIRM

:LOCK

ren Private "Control Panel.{21EC2020-3AEA-1069-A2DD-08002B30309D}"

attrib +h +s "Control panel.{21EC2020-3AEA-1069-A2DD-08002B30309D}"

echo The Folder has been locked

goto End

:UNLOCK

echo waitz.... enter the pass first!!!

set/p "pass=>"

if NOT %pass%== private goto FAIL

attrib -h -s "Control Panel.{21EC2020-3AEA-1069-A2DD-08002B30309D}"

ren "Control Panel.{21EC2020-3AEA-1069-A2DD-08002B30309D}" Private

echo Folder Unlocked successfully

goto End

:FAIL

echo Invalid password

goto end

:MDPRIVATE

md Private

echo The Folder successfully made

goto End

:End

After you paste the code above in notepad worksheet, save it with file name:LOCK.bat

I tell you not to forget to give the extension .bat.

And then run the batch file named LOCK which you have made earlier, and you’ll see there’s a new folder named private.

Save all your private data, document, music, video, etc in that folder. Then to lock the folder, you have to run the batch file again. If you sure want to lock that folder type Y on the command prompt line.

And then you’ll see that the folder had been disappeared. If some time you want to access that folder again, just double click the batch file named LOCK and enter the password, which is originally private.

You can change your password by making a little change on the command line situated in row 21:

if NOT %pass%== private goto FAIL

Change the word private with your new password characters.

And finally save the change.

Translated and adapted from Jatibarang blogspot.


Readmore,..

Rapidshare Tips, Tricks and Hacks

Rapidshare is the biggest file sharing website nowadays. But many people feel disappointed when they have to pay some bucks to get the premium account. For you who don’t want to waste your money to get that damn premium account, follow this tips. I know that this tips below is kinda oldschool, but I bet some of you haven’t know about this tips.


First you have to install Grease monkey plug-in in Mozilla Firefox.

Released at the end 2004, Greasemonkey is the latest in a growing arsenal of Firefox customization tools. It changes how Web pages look and act by altering the rendering process. Greasemonkey is to Firefox what aftermarket parts are to cars -- it lets you personalize your browser by making it faster and more powerful or simply by making browsing more aesthetically pleasing. How and why you will use Greasemonkey (and I predict you will, if you don't already) will depend on how you browse now.

CODE

http://greasemonkey.mozdev.org/

1) Install the Greasemonkey extension >>
CODE

http://downloads.mozdev.org/greasemonkey/greasemonkey_0.2.6.xpi

2) Restart Firefox
3) Go to
CODE

http://rapidshare.de/files/1034529/rapidshare.user.js.html

4) Right click on rapidshare.user.js and choose "Install User Script".
Run FireFox.
From File Menu click on Open File then brouse to whereever you saved the 'greasemonkey.xpi' plug-in. Open it, wait a couple seconds for the install button becomes active. Click on it to install this plug-in then CLOSE FIREFOX.
Run FireFox again. From the File Menu click on Open File then brouse to whereever you saved the 'rapidshare.user.js'. Open it. Click the Tools Menu then click on Install User Script then click OK.
Close FireFox.
The script will let you enjoy "no wait" and multiple file downloads

Second, you have to try Rapidshare premium link generator

Right now the generator is working with only.de version of the website and doesnot support .com.They are trying to fix the code for .com website also
Proxylist :
Sometimes you might get error like this on your download page " The number of download slots for your country are over ".For those here is a web proxy.This site allows you to bypass rapidshare, megaupload download limits.Paste rapidshare url to form and then choose web proxy and click 'Go' - it will change your IP. If it wont works you should choose another web proxy.

All that you need in rapidshare include:

1-Rapidshare Download Resetter
2-Get RapidShare 6.0
3-LiNKGRABBER.v.3.1.4
4-MaC Rapid v1.6a Beta11
5-More RapidShare
6-Nuevas Cuentas Premium
7-Rapid Decoder 0.2
8-Rapidget
9-RapidHarvest
10-Rapidleecher php
11-Rapidmule Rapidshare Downloader
12-Rapidshare Decoder
13-Rapidshare Downloader
14-Rapidshare Links Decoder
15-Muchas Cuentas De Rapidshare!!
16-Rapidshare Accounts Checker
17-Rapidshare Premium Accounts Generator
18-Rapidshare Links Cheker
19-Rapidup
20-RaptorTools
21-Rapidshare Leeching Script
22-The Grabber
23-Ilimitado Rapidshare Con IE
24-USDownloader
25-Rapidshare Anti-leech Decrypter
26-Rapidshare Leecher
27-RapGet v.11
28-RapidUp v1.31
29-Rapidshare Time Resetter
30-Tips Rapidshare Download Xtreme Neo
31-Rapidshare Spider
32-Grabber v1.4.5 P
33-RapidSearch
34-Cambiar IP
35-Relentless Rapidshare Spyder
36-Rapidshare Spyder
37-Keygen Premium Accounts
38-Más de 1.000 Cuentas Premium
39-Spyder Rapid
40-.Reg IE Downloader Unlimited

Download:
http://rapidshare.com/files/10912254/Rapid-Share_Super_Pack_Tools_v2.part1.rar
http://rapidshare.com/files/10913512/Rapid-Share_Super_Pack_Tools_v2.part2.rar
http://rapidshare.com/files/10914998/Rapid-Share_Super_Pack_Tools_v2.part3.rar
http://rapidshare.com/files/10917148/Rapid-Share_Super_Pack_Tools_v2.part4.rar
http://rapidshare.com/files/10918660/Rapid-Share_Super_Pack_Tools_v2.part5.rar
http://rapidshare.com/files/10919183/Rapid-Share_Super_Pack_Tools_v2.part6.rar

RapidLeecher v 5 Alpha

RapidLeecher is the ultimate, easy to use and free software to leech links from file share service Rapidshare, you just paste the link and your download will automatically get downloaded to your desktop with maximum speeds and minimal user interaction. The free software also has support for using proxy servers so that you can download many files at the same time (using different proxy).It works with Rapidshare new website also.

  1. Automated Downloading.
  2. Auto start and system tray support.
  3. Clipboard monitoring.
  4. Silent operation mode, will sit and wait for links in system tray.
  5. Proxy Support for simultaneous downloads and unlimited downloading.
  6. Inbuilt Downloader with detailed static's.
  7. Full installer and uninstaller.
  8. Simple utility.
  9. Pleasant, easy to use interface.
  10. Constantly Updated.
  11. Adware & Spyware Free.
  12. Support is provided for users with quick BUG FIXES
  13. Best of All its FREE & SAFE.

After you click on the link below,you will find the countdown on the bottom right of the page,After the countdown is over you will get the download link

Download from this site

I updated most of the link of downloading.If you have any new tricks of getting premium downloads please post it as a comment

Source:trap17 and impcompfact.blogspot

Thanks for those sites…


Readmore,..

Lime Wire 4.18

Download Now (4.67MB)

Tested spyware freeclip_image001

LimeWire 4.18.6 is the world´s fastest P2P file-sharing application, letting users share and search for all types of computer files, including movies, pictures, games, and text documents. The application´s other features include dynamic querying, the ability to preview files while downloading, advanced techniques for locating rare files, and an extremely intuitive user interface.

LimeWire is compatible with the Gnutella file-sharing protocol and can connect with anyone else running Gnutella-compatible software.


At startup, the LimeWire program will connect, via the internet, to the LimeWire Gateway, a specialized intelligent Gnutella router, at startup to maximize the user's viewable network space.LimeWire is a tool that allows you to share files over the internet.

Further, the most recent version of Lime Wire enables Group functionality, so that users can connect to other people interested in sharing the same kinds of files that they are.

Features:

  • Ease of use - just install, run, and search
  • Ability to search by artist, title, genre, or other metainformation
  • Elegant multiple search tabbed interface
  • "Swarm" downloads from multiple hosts help you get files faster
  • iTunes integration for Mac users
  • Unique "ultrapeer" technology reduces bandwidth requirements for most users
  • Integrated chat
  • Browse host feature--even works through firewalls
  • Added Bitzi metadata lookup
  • International versions: Now available in many new languages.
  • Connects to the network using GWebCache, a distributed connection system
  • Automatic local network searches for lightning-fast downloads. If you're on a corporate or university network, download files from other users on the same network almost instantaneously!
  • Support for MAGNET links that allow you to click on web page links that access Gnutella.

Size: 4.67 MB
Publisher: Visit Website
Release Date: 2008-08-22
OS: Win 9x/ME/2K/NT/XP/Vista

Download Now (4.67MB)


Readmore,..

Easy Trick to Speed Up your Google Chrome

If you have know how to speed up Google Chrome with V8 benchmark suites or something like that. I have an easier trick for you to speed up your Google Chrome, this doesn’t need you to download V8 benchmark code or something like that. This trick called startup switch.


To use startup switch : create a new Chrome shortcut on your desktop (or elsewhere). Right-click it and choose Properties. In the Target field, add the switch in question immediately following the path to chrome.exe .

There are a lot Startup Switches that can be activeted when launching Google Chrome, some examples:

-disable-dev-tools
-disable-hang-monitor
-disable-images
-disable-java
-disable-javascript
-disable-logging
-disable-metrics
-disable-metrics-reporting
-disable-plugins
-disable-popup-blocking
-disable-prompt-on-repost

For a complete list of Startup switches see here

I got this tips from mygooglechrome.blogspot.com


Readmore,..

Enjoy the speedy browser of Google Chrome

From pcworld.com and pctipsbox.com

Click here to download Google Chrome

Google takes aim squarely at Microsoft with the release of its new Web browser, Chrome. Even though it isn't jam-packed with features, Chrome lives up to its hype by rethinking the Web browser in clever and convenient ways that make using the Web a more organic experience than you'd get with either Microsoft's Internet Explorer 8 or Mozilla's Firefox 3.


Initially available for download for Windows Vista and XP, Google plans to expand its Chrome offerings to the Mac and Linux platforms as well. The company doesn't offer any timeline for these versions, though. (For additional PCWorld.com coverage of Google's new browser, see "Chrome vs. the World" and "Google's Chrome: 7 Reasons for It and 7 Reasons Against It.")

Good features of Google Chrome:

  1. Chrome automatically detects the Web browser you're using and prompts you through the process of installation
  2. Chrome's layout is very simple
  3. At the touch of a button, Chrome lets you make a desktop, Start menu, or QuickLaunch shortcut to any Web page or Web application
  4. There is a feature called Omnibar, it lets you search not just your history, but Google and other sites as well.
  5. Provides incognito mode, private browsing mode.
  6. Provides a feature called Bookmark Manager.

After you feel excited about Chrome, here are the tips to supercharge your Chrome experience I got from pctipsbox.com:

    1) Install flash player in Google Chrome

    After you have installed Chrome, some of you will find that you are not able to view Youtube video. This is especially true if you are installing Chrome under Ubuntu (or other Linux distro).

    Here is what you can do to fix the problem:

    • Download the flash player for windows xpi file.
    • Change the xpi extension to zip
    • Extract the content of the zip file into a folder
    • Copy the files flashplayer.xpt and NPSWF32.dll to the directory /home/USERNAME/.wine/drive_c/windows/profiles/USERNAME/Local Settings/Application Data/Google/Chrome/Application/Plugins.
    • For Vista, copy to the directory: C:\Users\\AppData\Local\Google\Chrome\Application\Plugins
    • For XP,copy to the directory C:\Documents and Settings\\Local Settings\Application Data\Google\Chrome\Application\Plugins
    • Create the Plugins folder if it does not exist.

    Restart your Chrome. Your flash player should be working now.

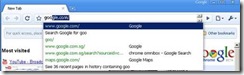
    2) Search from the URL bar

    Unlike Firefox, you can’t find a search bar in Chrome. To perform a search, simply type your search phrase in the URL bar and press ‘Enter’. Chrome will automatically perform a Google search with the phrase.

    clip_image001

    If you want to go to a site rather than performing a search, press “Ctrl + Enter” instead. This will insert www and .com in front and behind of the term and Chrome will bring you to the site.

    3) Change omnibox suggestion count

    By default, Chrome only shows 5 URL suggestions when you type in the URL bar.

    clip_image003

    o increase/decrease the suggestion count, simply add the command line switch

    –omnibox-popup-count=your_desirable_suggestions_count

    where your_desirable_suggestion_count is the number of suggestions that you want it to show.

    In Windows, right click on the Chrome shortcut icon and select Properties. In the Target field, add the above command line switch to the end of the command.

    In Ubuntu, on the desktop, right click on the Application menu and select Edit Menus. Navigate to wine->Programs->Google Chrome on the left pane. Double click on Google Chrome on the right pane and edit the Command

    4) Creating multiple profiles

    If you are sharing your computer with others (such as your family members), you may want to create a separate profile for everyone others won’t have access to your search history.

    Open the User Data folder your Chrome installation directory.

    For Windows Vista

    C:\Users\\AppData\Local\Google\Chrome\User Data

    For Windows XP

    C:\Documents and Settings\\Local Settings\Application Data\Google\Chrome\User Data

    For Ubuntu

    /home/USERNAME/.wine/drive_c/windows/profiles/USERNAME/Local Settings/Application Data/Google/Chrome/User Data

    Copy the Default folder and paste it in the User Data folder under another name (say Your_name).

    Create a shortcut icon on your desktop and add the following command switch to your path:

    –user-data-dir=”..\User Data\Your_Name”

    For Vista:

    C:\Users\USERNAME\AppData\Local\Google\Chrome\Application\chrome.exe -–user-data-dir=”..\User Data\Your_Name”

    For Windows XP

    C:\Documents and Settings\USERNAME\Local Settings\Application Data\Google\Chrome\Application\chrome.exe –-user-data-dir=”..\User Data\Your_Name”

    For Ubuntu

    wine /home/USERNAME/.wine/drive_c/windows/profiles/USERNAME/Local\ Settings/Application\ Data/Google/Chrome/chrome.exe –new-http –in-process-plugins –-user-data-dir=”../User\ Data\Your_Name”

    5) Change Chrome theme

    If you don’t like the default theme, you can easily change it with the following steps:

    • Download a Chrome theme of your liking.
    • Extract the default.dll file.
    • Navigate to your Chrome installation directory and go to /Application/Chrome version/Themes folder. The Chrome version will be in the form of 0.2.129.27. Replace the default.dll file in the folder with the default.dll file that you have just extracted.
    • Voila! Your Chrome is now dressed with the new theme.

    6) Email link with Gmail

    In Chrome, you can easily create a bookmarklet to email links with your Gmail account. Here is what you do:

    In your Chrome, press “Ctrl + B” to load the bookmark bar. Right-click on the bar and select ‘Add Page‘

    In the Name field, type Send with Gmail (or whatever name you like).

    In the URL field, copy and paste the following code:

    javascript:document.location=’https://mail.google.com/mail/?ui=1&view=cm&fs=1&su=’+document.title+’&body=’+document.location;

    and press OK.

    If you want Gmail to load in a separate tab, insert this code instead:

    javascript:window.open(’https://mail.google.com/mail/?ui=1&view=cm&fs=1&tf=1&su=’+document.title+’&body=’+document.location);return false;

    Whenever you want to send a link to other, simply click the Send with Gmail bookmarklet and the Gmail compose mail window will appear.

    7) Download Youtube video

    This trick allows you to download Youtube video right from your Chrome.

    Same as the Send with Gmail trick, make a new bookmarklet and name it Download Youtube

    In the URL field, copy and paste the following code in:

    javascript:window.location.href=’http://youtube.com/get_video?video_id=’ + swfArgs['video_id'] + “&l=” + swfArgs['l'] + “&sk=” + swfArgs['sk'] + ‘&fmt_map’ + swfArgs['fmt_map'] + ‘&t=’ + swfArgs['t'];

    Now go to Youtube and watch any video. Click the Download Youtube bookmarklet and it will save the current video to your hard drive. Remember to add a .flv extension to the downloaded video.

    8 ) Zoom in/out

    For those who find that the font is too big/small for your viewing, you can zoom in/out the page by pressing Ctrl + Mousewheel.

    9) Drag and drop tab to load in a new window

    When you have more than one tabs, you can easily drag any tab and drop it on the menu bar to load a new window.

    10) Install Greasemonkey on Chrome

    Although Greasemonkey is an addon for Firefox, you can easily get it to work in Chrome with this simple tweak:

    Drag this Monkey to your Chrome bookmark bar.

    This Monkey bokmarklet will enable any userscripts to be automatically turned into bookmarklets.

    To install Greasemonkey script on Google Chrome, go to user script and search for the Greasemonkey script you want. Visit the installation script page which says “install the script” and click on the Monkey bookmarklet, this will change the script into Chrome compatible bookmarklet. Now drag “Install the script” onto the bookmark bar of chrome.

Click here to download Google Chrome


Readmore,..

What is Torrent and How to Speed Up your Torrent

From what-is-torrent.com and pctipsbox.com

Torrent is a small file (around few kilobytes) with the suffix .torrent, which contains all the information needed to download a file the torrent was made for. That means it contains file names, their sizes, where to download from and so on. You can get torrents for almost anything on lots of web sites and torrent search engines.

Torrent is the most popular way of downloading large files, including movies and games (remember legality of downloading).


Downloading with a torrent is advantageous especially when downloading files, which are momentarily very popular and whitch lots of people are downloading. Because the more people download the file, the higher speed for everyone

Downloading with a torrent is actually very simple. You just need a rightly set torrent client (setting your connection speed is usually all you need to set). Then you open the torrent file inside your client, set a place where you want to download desired files and then just wait till it's downloaded. Downloading with a torrent is no more complicated than using any other p2p application, but even simpler.

Newest client versions:
uTorrent - 1.7.7(220 KB)
Azureus - 3.0.5.0(7,5 MB)

If you want to know more about torrents, continue to torrent principles or if you know enough, go pick a client to download.

Tips to Speed Up your Torrents:

1. Cap your upload (most important)

Limit your upload speed to approximately 80 percent of your maximum upload rate. You can check your upload speed over here (never trust your isp). Once you know your maximum upload speed, change the max upload (to 80%) speed in your torrent client’s preferences.

Don’t get me wrong, everyone should share as much as possible, but if your upload rate reached it’s max, your download rate suffers significantly.

2. Hack the max TCP connections

If you’re on XP sp2, your TCP connections are limited to a maximum of 10. This seriously hurts your downloading speed because it wont let you connect to a high amount of ip numbers. It is supposed to slow down viruses because their spreading strategy is to connect to a high amount of ip numbers, but it also cripples your torrent downloads.

A nice way to fix this is to download this patch, it allows you to set the maximum allowed connections to any number you want. Any number between 50 and 100 is ok .

3. Check seeds and peers

A simple tip, but o so important. Always look for torrents with the best seed/peer ratio. The more seeds (compared to peers) the better (in general). So 50 seeds and 50 peers is better than 500 seeds and 1000 peers. So, be selective.

4. Change the default port.

By default, BitTorrent uses a port 6881-6999. BitTorrent accounts for a lot of the total internet traffic (1/3), so isp’s like to limit the connection offered on the these ports. So, you should change these to another range. Good clients allow you to do this, just choose anything you like. If you’re behind a router, make sure you have the ports forwarded or UPnP enabled.

5. Disable Windows Firewall

It sucks. Windows Firewall hates P2P and often leads a life of it’s own. So disable it and get yourself a decent firewall, Kerio or Zone Alarm for example.


Readmore,..

STARTUP BLASTER : make your windows startup faster

Just as usual,i will give you free software,and some review about it. In this moment,I give you Startup Blaster for free.Startup Blaster is a software made by XenCare,like it called,its function is to faster your windows startup. So,this software is right for those who fed up with slow startup on your windows operating system.

Actually,there are some reason behind slow startup on your computer,one most considerable is your startup system that contain:

  • Startup Entries to run associated services for programs
  • Startup Entries to run the program on windows startup
  • Startup Entries to load some DLL sometime to run the corresponding program
  • and some other entries within your startup system

Those things automaticaly added in your startup system when you install various programs on your computer. Therefore, you can filter what startup entries that windows should load it or not when windows startup. Just click Windows,point to Run,and type msconfig,click on the startup section,there you can check and uncheck startup entries windows should load it or not.

image


But,if this trick doesn't work effectively on your computer,you should spend some time to try Startup Blaster. I tell you, it has a simple interface, so it doesn't difficult you when you are using it.

clip_image002


There, you can wheter delete or delay Startup programs, which give you a flexibility of doing your computer things. Click this link below to download Startup Blaster.

Download Startup Blaster

Readmore,..